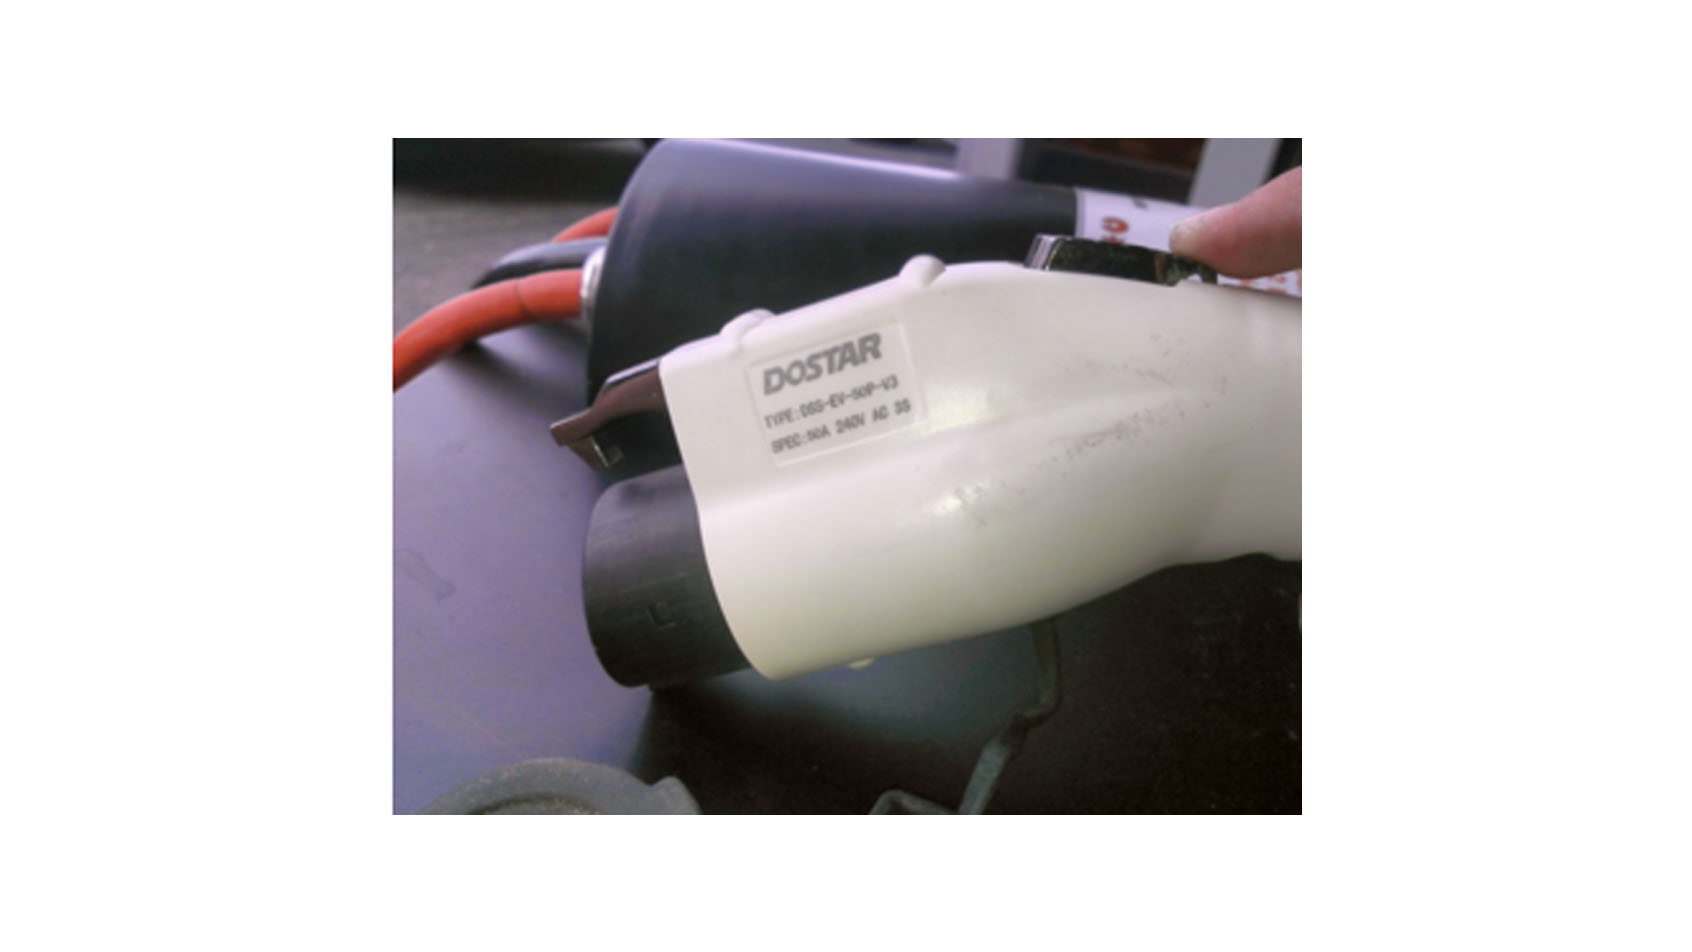
1772 DOSTAR Plug - Release Lever Fixes
Jan 19, 2016
Failure Modes
There are 3 different ways the handle lever can be damaged. All three problems result in the same symptom - the release lever “proximity switch” will not release, thus the car believes you are holding down the release lever and will not charge. The switch is there to warn the car that you’re unplugging the handle, so it immediately stops charging, and doesn’t arc/spark when you unplug it.
- The switch's activation strip (little metal bar) inside the handle is too close to the lever body, so it triggers way too easily and the socket in the car holds it just barely too close to release the switch when plugged-in. This same mechanism is present in all Dostar handles, both metal and plastic levers, but primarily affects the metal-lever handles (doesn’t seem to be present in the plastic ones). This flaw is mostly related to the manufacture date/batch of the cables. To fix this issue, jump to section A.
This symptom is evident by the switch in the handle “clicking” very early in the motion of the lever, but the lever still travels smoothly and the latching end travels the full range of motion in its plastic cut-out, and the lock hole is still fully visible when released.
2. The lever itself actually bends, giving it a shorter range of motion. This happens if the release button is forced against the lock on the vehicle (lock holds the latch tip down, while the button is firmly pressed to try releasing the handle, lever bends as a result). It can also be caused by dropping the J-handle on the hard floor/concrete, but that usually results in (3) below. To fix this issue, jump to section D.
This damage is evident by the lock-hole not being fully visible when the lever is released, but the lever still presses and releases smoothly (though not a full range of motion).
3. The pivot-point shaft of the lever gets bent, which causes the lever to be sticky, and not move smoothly when pressed. So, when you press it down, it simply doesn't return back to the "released" position on its own, or has only a little spring in it. This is often caused by the handle being dropped onto the release latch at the front of the plug - you can tell if it’s been dropped by a “scar” on the tip of the latch. To fix this issue, jump to section A for disassembly, then proceed to section B when instructed.
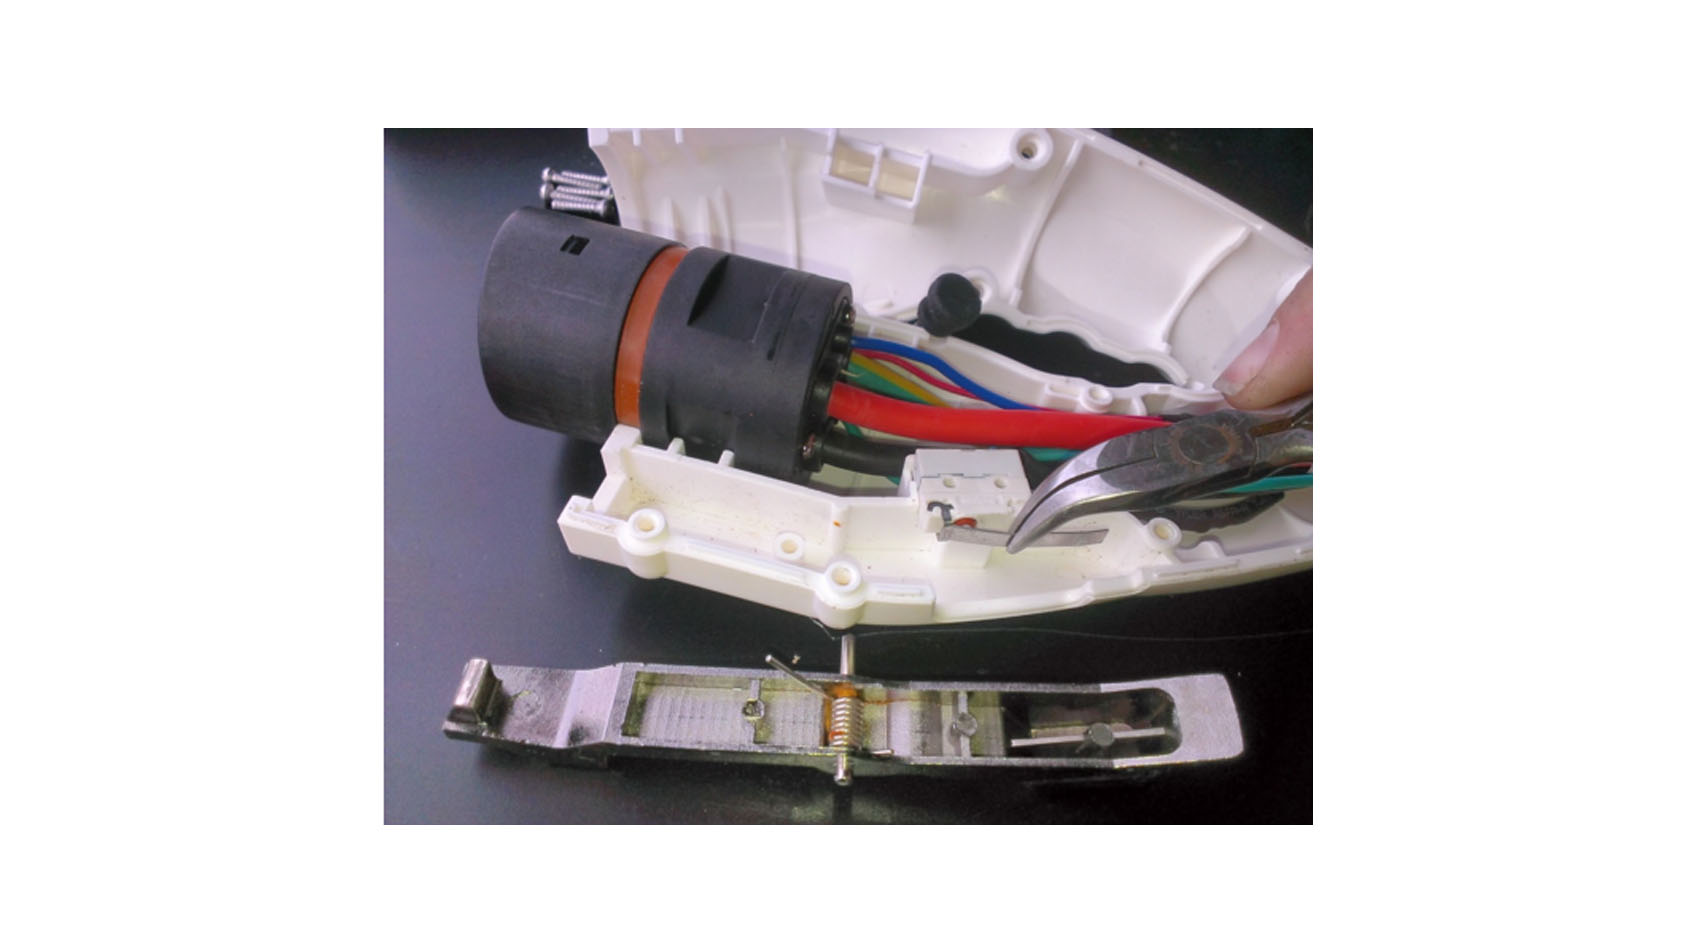
Section A - Disassembling the handle (activation strip & lever shaft)
- Start with T-15 Torx driver & Needle-nose pliers


4. Remove the latch body. The lever shaft may get stuck in the upper half of the plug - be sure to remove it.
5. If you’re repairing a bent lever shaft, proceed to section B.
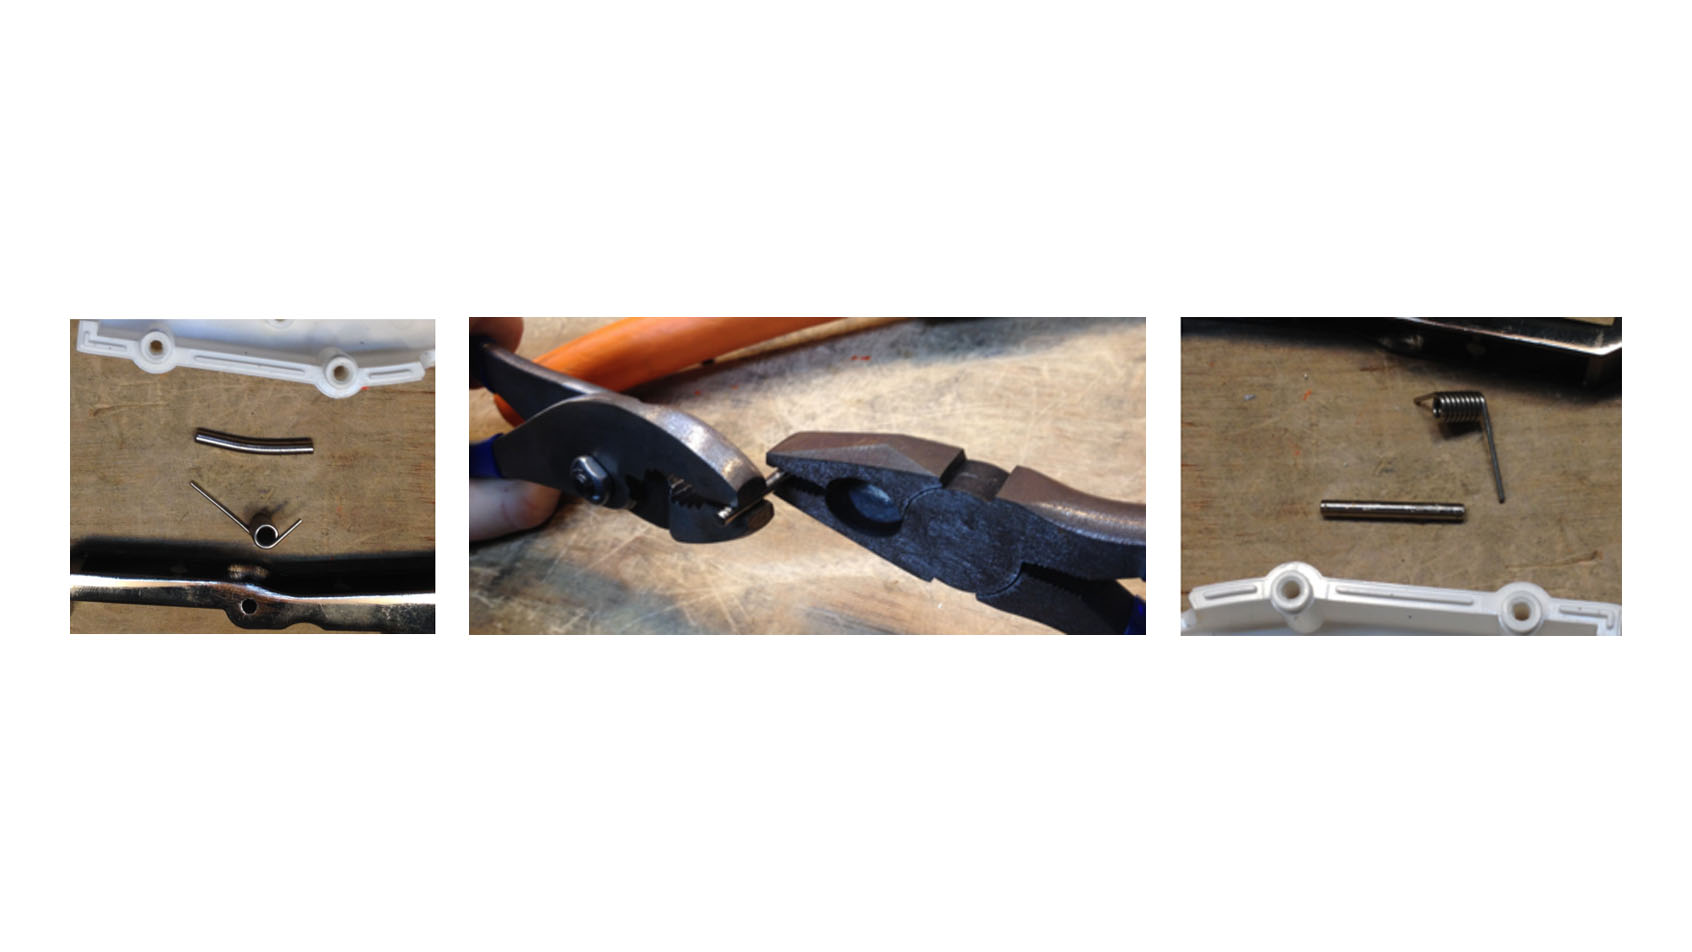
If you’re adjusting the contact point of the switch, bend the contact strip to reduce the point at which the switch is activated, as shown:
6. If you’re adjusting the contact point of the switch, proceed to section C for reassembly.
Section B - Straightening the lever shaft
1. If the lever shaft is bent, as shown, then you will likely need two sets of pliers, or some other means to straighten it out.
2. Straighten the shaft as much as possible, so that it can roll on a table smoothly:
3. Proceed to Section C for reassembly.
Section C - Reassembly
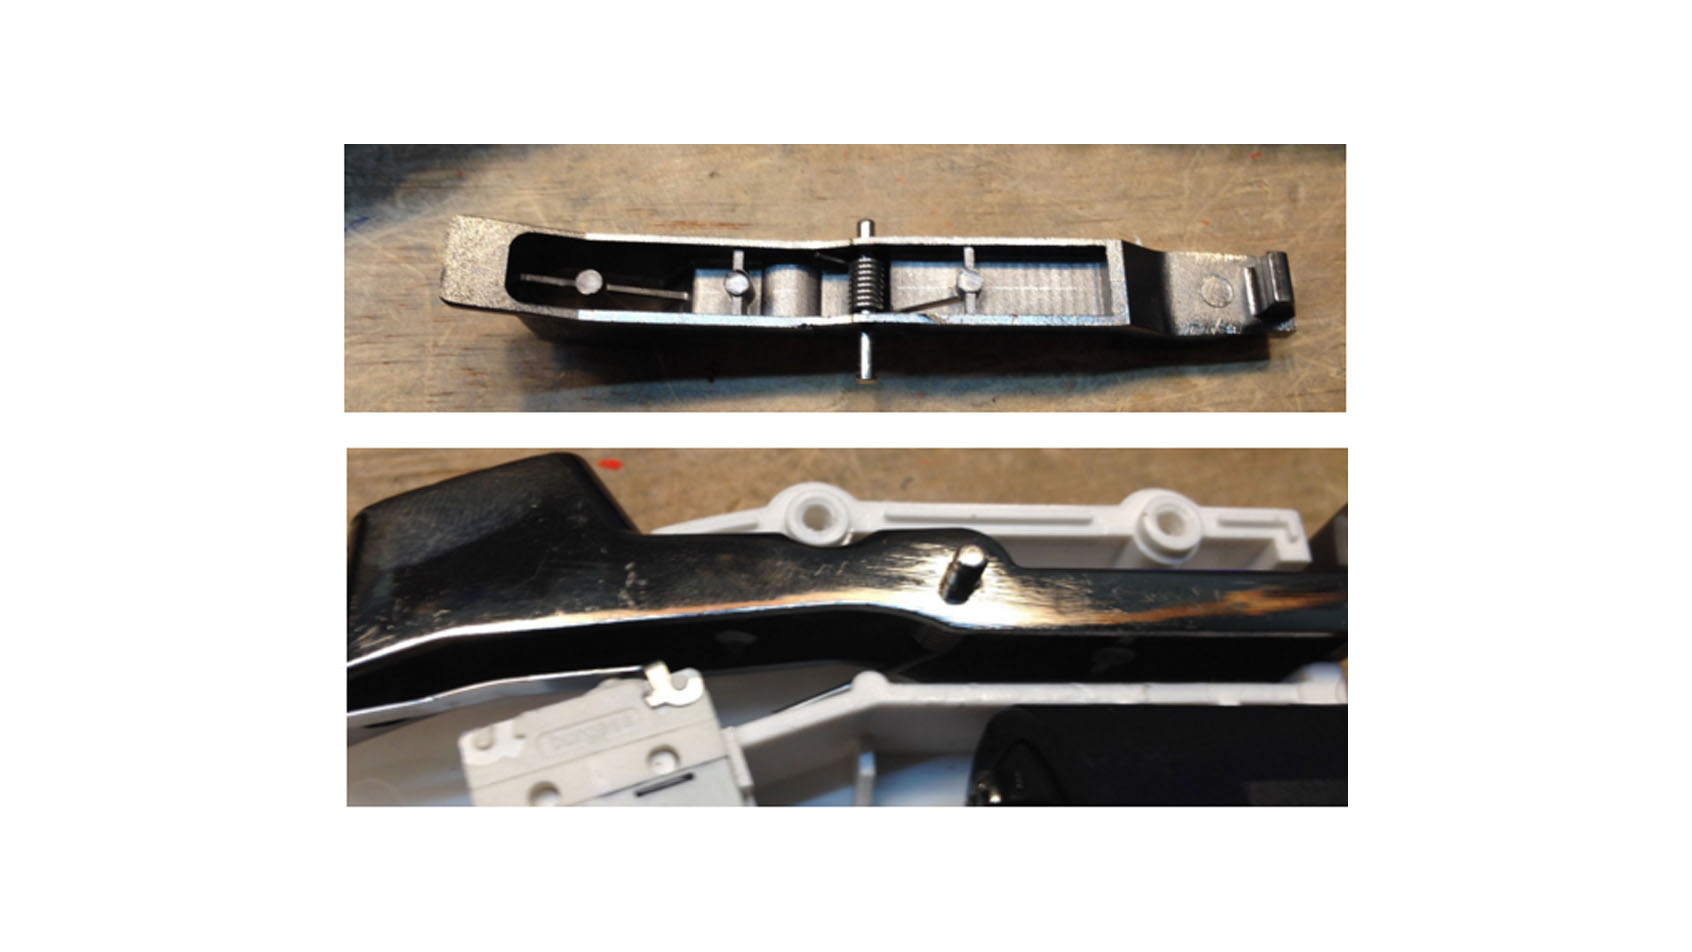
1. Place the spring and shaft into the lever body as shown.
2. Re-install the lever body into the handle, and reload the spring back into the plastic housing.
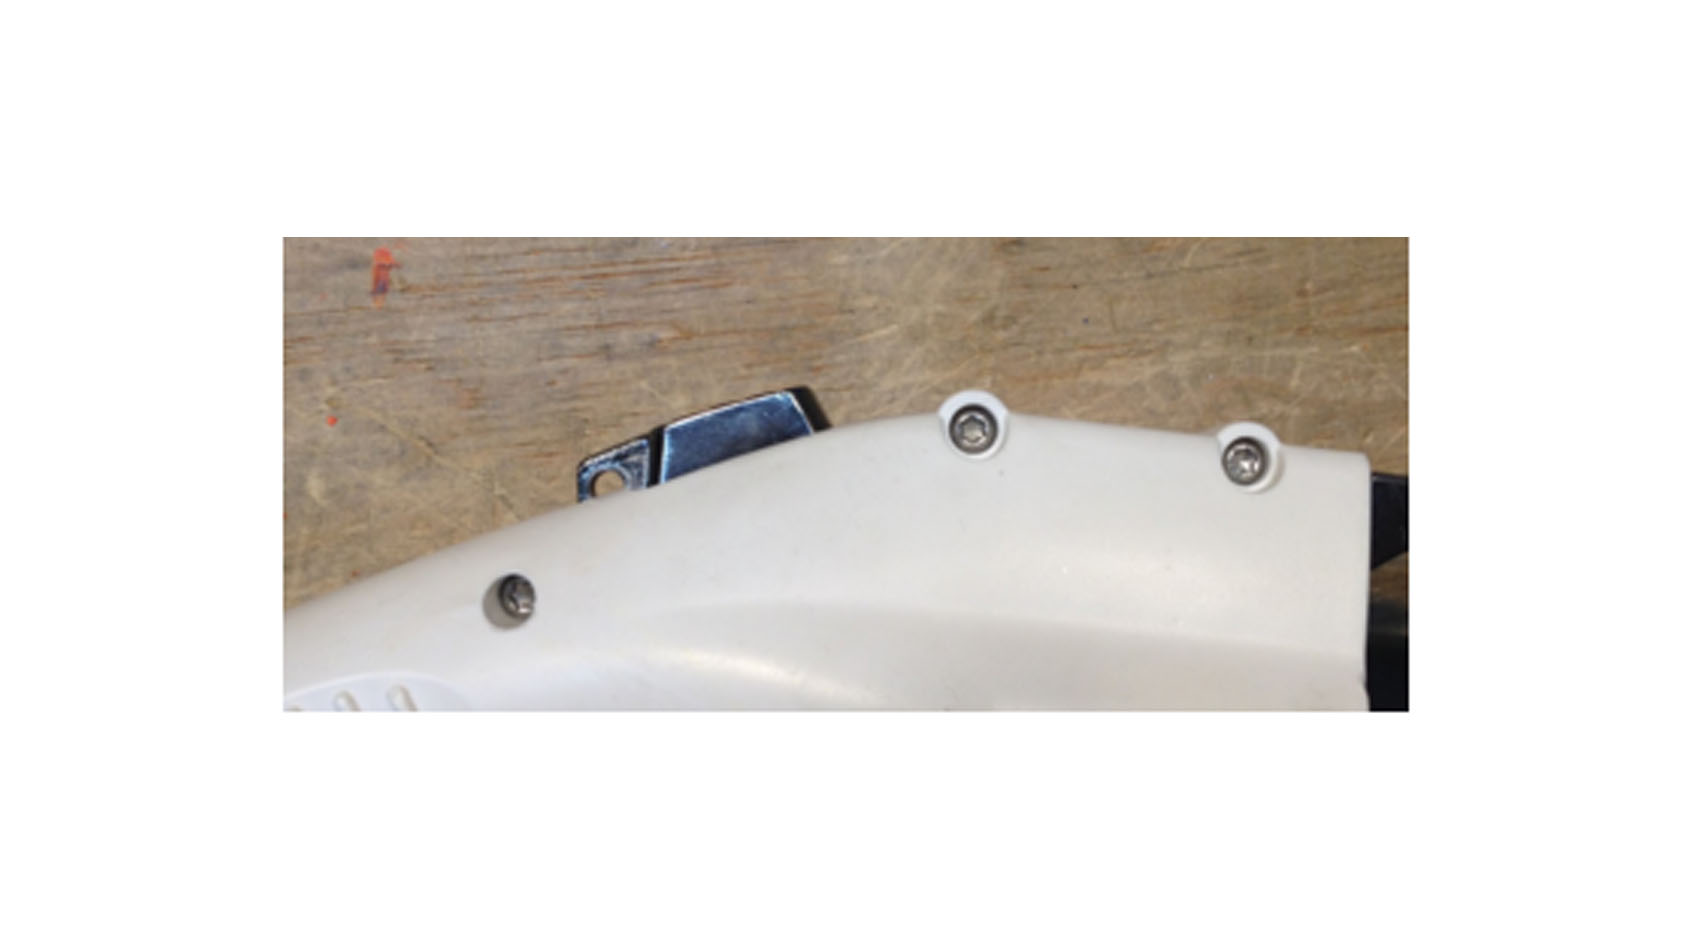
4. Seal it back up by placing the upper housing back onto it, making sure to re-attach the rubber plug protector if desired. Note that two of the Torx screws are smaller than the others - those go in the two holes at the bottom, closest to the cable.
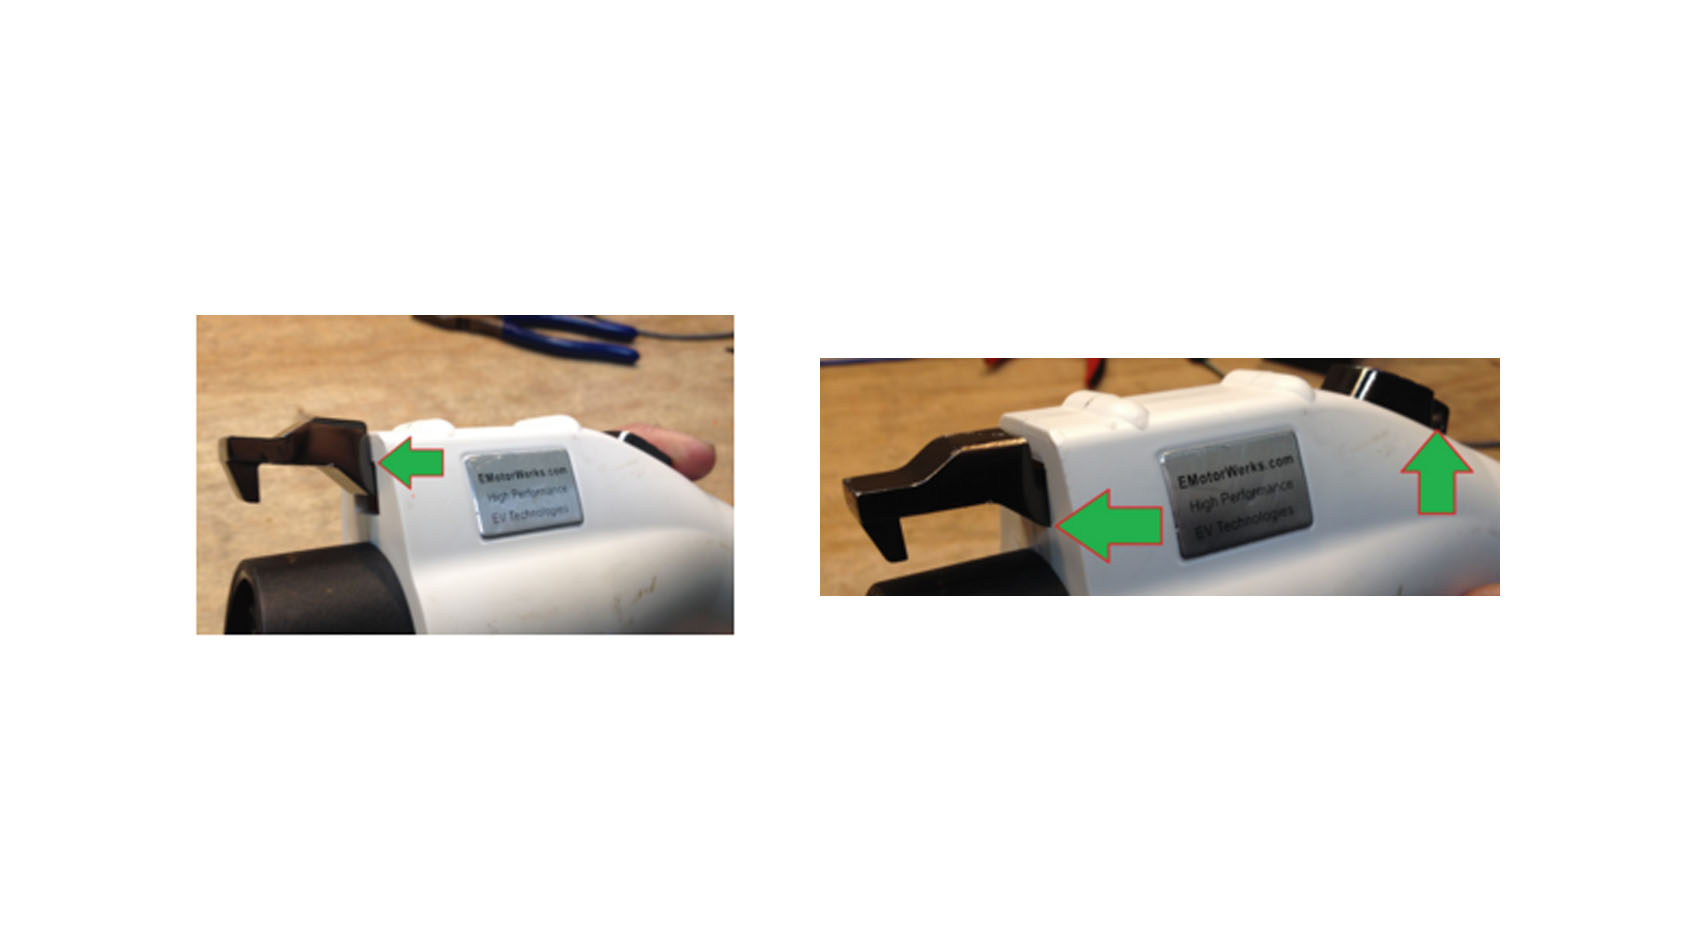
Section D - Fixing a bent lever (metal latch only!)
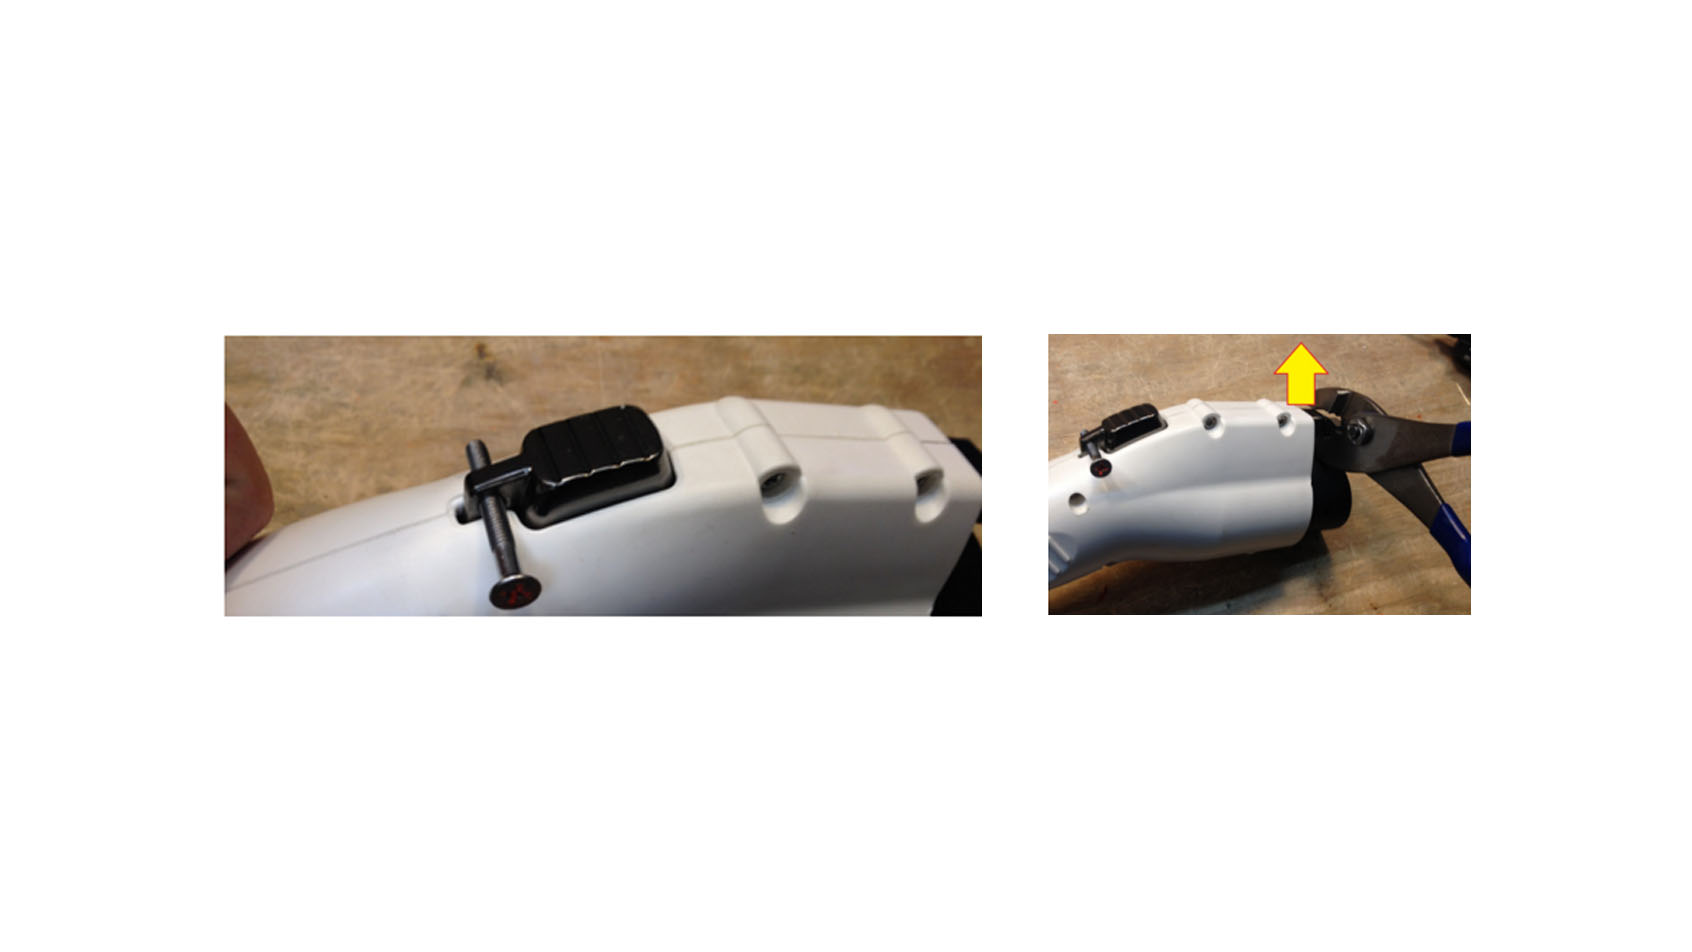
1. Use a rigid (preferably metal) object, or a lock, to hold the button end of the latch in place as firmly as possible.
2. Be creative but careful in this part - you should now apply upward force on the latch end to bend it straight. The metal may break if a striking force is used (e.g. a hammer), or if bent too far. Be careful not to bend it too far, though you can correct it by pushing both ends down instead of up.
When the lever is properly straightened, the latch end should travel the full range of motion within the plastic handle body cut-out, and the proximity switch should “click” around half-way through the lock hole travel. The lock hole should be fully exposed when released.
3. That’s it! Now, when plugged into the car, there should be a “click” from the handle switch when you press the release button.